Secure endpoints. Better user experience.

Intune Management
Endpoint Security
User Experience
Modern Workplace

Category: Entra

Everything Microsoft Entra

  • Microsoft Edge Management Service: Extension Monitoring, Policies, and Updates

    Managing Microsoft Edge with Intune gives admins strong configuration control, but it does not always provide the full visibility needed into browser extensions, update status, and cross-platform browser management. The Microsoft Edge management service helps close that gap by giving admins a centralized place to monitor extensions, review policies, track update status, and manage scenarios that are not always covered by Intune alone. In this blog post, I’ll walk through where the service adds value, how to get started, and when I recommend using Cloud policies instead of Intune policies.

    This blog post will cover:

    • General prerequisites
    • How to get started with the Microsoft Edge management service
    • Configuration policies – Cloud and Intune
    • Edge extensions
    • Edge updates
    • Other features in the Microsoft Edge management service
    • My take
    • Useful links

    General prerequisites

    • You must be a Microsoft Edge Administrator (if you follow least privilege) or Global admin to access the experience in Microsoft 365 Admin Center.
    • Enable the Microsoft Edge management service in the Microsoft 365 admin center.
    • Microsoft Edge 115.0.1901.7 or greater installed.
    • Users must be logged into Microsoft Edge.

    How to use the Microsoft Edge management service

    Let’s start with the basics

    You can find the Microsoft Edge management service in the Microsoft 365 admin center(https://admin.cloud.microsoft)> Settings > Microsoft Edge.

    To start using the service, select Enable then select what services should be enabled and select Save.

    Configuration policies

    You can monitor existing Microsoft Edge policies and create new policies directly from the dashboard. There are two available policy types: Cloud policies and Intune policies.

    Let’s walk through the differences, when to use each option, and how policy conflicts are handled.

    Cloud policies

    Cloud policies are created and managed in the Microsoft Edge management service.

    Depending on the setting you configure, Cloud policies can apply Microsoft Edge settings across supported platforms, including Windows Server.

    Why would you use Cloud policies instead of Intune policies?

    • Configure Microsoft Edge on supported platforms outside your Intune-managed Windows estate, including Windows Server.
    • Prioritization: Configuration policies with conflicting settings will take the value of the policy with the highest priority.
    • Extension requests: Admins will be able to view the extensions that users have requested and take action to approve or deny these requests.
    • Organization branding: Admins will be able to apply their organization’s branding to customize the look and feel of the browser.
    • Manage scenarios where the operating system is not supported by Intune or where devices are not enrolled in Intune.

    Below is an example of policies in the Microsoft Edge management service. Notice the priority, policy type, scope, and platform columns. Together, these give you a useful overview of where each policy will apply.

    Intune policies

    A configuration policy created as an Intune policy is available in both the Microsoft Edge management service and the Intune admin center. Policy details sync between the two experiences, with some limitations:

    • Scope tags: Cannot be set in the dashboard, only in Intune.
    • Detailed assignment: Policies created in the Microsoft Edge management service can only be assigned to target user groups. If created in Intune, the configuration policy can target devices and exclude specific user groups. Assignment filters can also be applied when the policy is created in the Intune admin center.
    • Role-based access control (RBAC): Can only be set via Intune.

    My recommendation is to continue creating Microsoft Edge policies for enrolled Windows devices in Intune. For other supported platforms, Windows Server, or devices that are not enrolled in Intune, Cloud policies can be a great complement.

    When to use what

    Use Intune policies when…Use Cloud policies when…
    You manage enrolled Windows devices and need device targeting, scope tags, RBAC, assignment filters, and full Intune management control.You need to manage supported platforms or scenarios not fully covered by Intune, such as Windows Server or devices that are not enrolled in Intune.

    Policy conflicts

    Any policies you apply with the Microsoft Edge management service will be overridden if they conflict with an existing Group Policy Object (GPO) or Mobile Device Management (MDM) policy that is set on the device.

    Edge extensions

    Previously, if you wanted broad visibility into browser extensions, Microsoft Defender Vulnerability Management was often part of that conversation. In practice, that meant either Microsoft Defender Vulnerability Management standalone licensing or the Microsoft Defender Vulnerability Management add-on if you were already using Microsoft Defender for Endpoint Plan 2.

    With the Microsoft Edge management service, admins can now monitor and manage extensions from a more centralized experience. This is a big step forward for both security and user experience.

    What can admins do with extensions in the Microsoft Edge management service?

    • Extensions monitoring: Monitor installed extensions.
    • Manage extension requests: Extensions requested by your users appear in the Microsoft Edge management service. You can allow users to request blocked extensions.
    • Add extensions: Microsoft Edge Add-ons store or specify an external extension ID.
    • Manage permissions policy: Allow, block, force install, normal install (installed but users can disable it).
    • Manage extension permissions: Customize permissions by choosing which permissions are not allowed.
    • Manage settings for all extensions: Configure allowed or blocked hosts, install sources, and more.

    For full details, check the links under “Useful links”.

    This is advanced centralized management of Microsoft Edge extensions. For this capability alone, the Microsoft Edge management service is worth enabling and exploring.

    Edge updates

    To monitor Microsoft Edge versions, you need to enable version monitoring. When this is enabled, Windows devices send update status to the dashboard.

    You can monitor which devices are up to date, which devices have updates available, and which devices have recommended updates. You can also monitor channel status.

    Keeping Microsoft Edge up to date is important from a security perspective, but it also helps users get access to new functionality and improvements faster.

    For devices that are out of date, you can choose one of the following actions to keep those browsers up to date.

    Force auto restart when device is idle: This automatically restarts the users’ browsers to apply the latest update when their device is detected as idle (20 minutes of no user input). Users are notified, and their tabs will be restored.

    • Recommend restart: This action sends a notification to the user to restart their browser to apply the latest update.
      No action will be taken on their behalf, and users may choose whether to act upon the notification.

    If a device has not sent data for 30 days, then the update information for that device will be deleted from the Edge management service.

    Other features in the Microsoft Edge management service

    Besides the topics covered in this blog post, the Microsoft Edge management service also lets you manage several other areas, including:

    Manage site lists – Create lists of websites and specify which browser or browser mode should open each site.

    Manage Edge connectors – Configure and manage device trust, reporting, and data loss prevention connectors to extend the value of your security solutions in Microsoft Edge for Business.

    Manage Copilot in Edge – Manage how users in your organization interact with Microsoft 365 Copilot Chat and related AI-powered experiences in Microsoft Edge.

    Sync Microsoft Purview policies – Sync Edge settings with Microsoft Purview policies that target unmanaged GenAI apps in Microsoft Edge for Business.

    My take

    Start using the Microsoft Edge management service today. There are no real downsides to getting more visibility into Microsoft Edge in your environment, especially when the service gives you insights that are hard to get elsewhere. My recommendation is to plan your organization’s extension strategy, use the Microsoft Edge management service to gain visibility, and then enforce what should be allowed or blocked. For configuration, I would still keep Intune as the primary management plane for enrolled Windows devices, but use Cloud policies for supported platforms and scenarios that are not covered by Intune.

    I’m really happy to see this capability available, and I’m sure I’ll revisit this topic as the Microsoft Edge management service continues to evolve.

    Useful links

    Microsoft Learn – Monitoring dashboard

    Microsoft Learn – Edge extensions monitoring

    Microsoft Learn – Activate your DLP policy in Microsoft Edge

    Microsoft Learn – Connectors Overview

  • Intune Client-Driven Compliance Evaluation

    Compliance status in Microsoft Intune is often treated as a simple yes-or-no value, but in practice it directly affect user access, support workload, and the overall endpoint experience.
    When a device has been remediated but compliance has not yet refreshed, users may still be blocked even though the issue is already resolved.

    The challenge with compliance today

    If you work with Microsoft Intune, you’ve probably experienced this scenario:

    After successfully fixing compliance issue. Perhaps BitLocker is enabled, Defender protections are restored, or a required security configuration is corrected. The device is now compliant, but Intune and Conditional Access don’t immediately know that.

    Administrators and users often end up waiting for the next compliance evaluation cycle or trigger it manually from company portal before the updated state is reflected in Intune and Entra.

    This delay creates unnecessary friction and leads to:

    • Users being blocked from accessing Microsoft 365 resources
    • The helpdesk may receive calls and spend time forcing syncs
    • Administrators struggle with compliance troubleshooting
    • A overall worse user experience

    What Microsoft is changing

    Microsoft has announced a new upcoming capability called Client-Driven Compliance Evaluation for supported Windows devices.

    “Microsoft Intune will introduce client-driven compliance evaluation for Windows devices to reduce delays in compliance reporting. Supported devices will detect important state changes locally and proactively request a compliance re-evaluation when it matters, instead of waiting for the next scheduled check-in. As an admin, you’ll see faster updates for remediation, reporting, and access decisions. This capability will roll out in preview for Windows devices.”

    This shifts compliance from a purely schedule-driven model toward a more event-driven approach.

    Why this matters

    For many organizations, compliance is more than reporting.

    Compliance status often drives:

    • Access to Microsoft 365 resources
    • Device remediation workflows
    • Security posture monitoring
    • Executive reporting

    How it works

    Microsoft has only provided a high-level description of the capability so far.

    The current documentation confirms that:

    1. The Windows device detects certain local state changes.
    2. The device requests a compliance re-evaluation.
    3. Intune receives the updated compliance information.
    4. Reporting and access decisions are updated faster.

    Supported Compliance Signals

    Microsoft has not yet published which compliance signals will trigger an immediate re-evaluation. Until more details become available, it remains unclear which compliance settings will participate in this new process.

    Potential impact on Conditional Access

    One of the most interesting aspects of this feature could be its impact on Conditional Access.

    If compliance evaluations can be triggered immediately following remediation, access restoration could become significantly faster.

    Questions that remain unanswered

    Although Microsoft has confirmed the capability, several important details remain unknown.

    Which Windows versions are supported?

    Microsoft has not yet published the supported Windows versions or build requirements.

    Is Intune Management Extension involved?

    At the time of writing, Microsoft has not documented whether the feature depends on:

    • Intune Management Extension
    • Windows MDM components
    • A new compliance agent architecture

    Will Custom Compliance be included?

    Many organizations now use Custom Compliance for advanced validation scenarios.

    Microsoft has not yet stated whether custom compliance scripts and JSON-based compliance policies will trigger client-driven re-evaluation events.

    What about Microsoft Defender for Endpoint risk signals?

    This is potentially one of the most important unanswered questions.

    Organizations frequently use risk-based Conditional Access and Defender compliance signals.

    It remains unclear whether device risk level changes, Defender alerts, or exposure score updates will trigger a client-driven compliance re-evaluation.

    What Endpoint Administrators Should Watch For

    As soon as the feature is released, I will publish a follow-up article. Until then, I recommend tracking the following resources as Microsoft expands the public documentation:

    In development – Microsoft Intune

    What’s new in Microsoft Intune

    Microsoft 365 Roadmap

    My Take

    The biggest benefit of this feature isn’t faster compliance reporting—it’s faster recovery.

    Users don’t care when the next compliance cycle runs; they care about getting access back after fixing an issue.
    If Client-Driven Compliance Evaluation can reduce the delay between remediation and access restoration, it could significantly improve both the end-user experience and IT efficiency.

    This is definitely a feature I’ll be watching closely as Microsoft shares more details.

  • Microsoft Entra Connect Sync now supports passwordless authentication

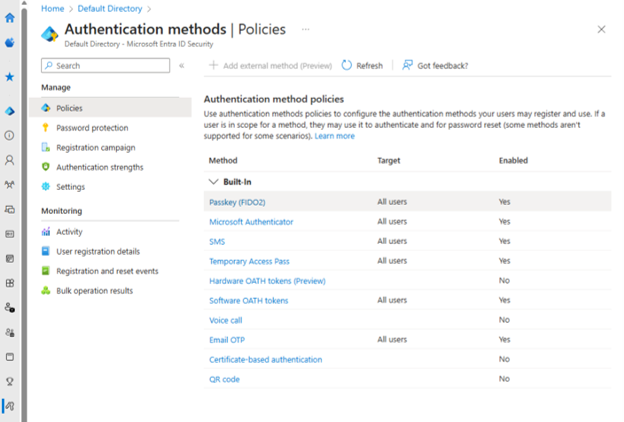
    Microsoft Entra Connect Sync now allows administrators to sign in with secure, modern credentials such as FIDO2 security keys, passkeys, or Windows Hello.

    This eliminates the need to make exceptions in Conditional access and enables passwordless authentication for accounts used to setup and manage Entra Connect Sync.

    Prerequisites

    • A Microsoft Entra account with the Hybrid Administrator or Global Administrator role.
    • A FIDO2 security key, such as a YubiKey.
    • Windows Server 2022 or later.
    • Enable passwordless authentication methods in Microsoft Entra ID.
    • Add the registry value on the server running Entra Connect Sync as described below.

    Turn on passwordless authentication for Microsoft Entra Connect Sync

    To make passwordless sign-in available in the installation wizard, install Microsoft Entra Connect Sync and set a registry key.

    1. Install Microsoft Entra Connect Sync. For installation steps, see Get started with Microsoft Entra Connect Sync by using express settings.
    2. On the server, open PowerShell and run the following command to enable passwordless:

    Enable passwordless authentication

    ###Enable passwordless authentication###
    New-ItemProperty -Path "HKLM:\SOFTWARE\Microsoft\Azure AD Connect" -Name "EnablePasswordlessAuth" -Value 1 -PropertyType DWORD -Force

    Disable passwordless authentication

    If you by any chance decide that you need to turn off passwordless authentication and return to signing in with a username and password, set the registry value to 0.

    Conclusion

    A quick change to make your passwordless journey a bit more complete. for more information please check Microsoft Learn page about the topic.

  • Universal Print – Complete guide!

    Universal Print – Complete guide!

    How to enable universal print from start to finish and some good tips wile at it!

    Universal Print is included in most of Microsoft 365 corporate licenses and can be used to manage printers for cloud-native Windows devices. A natural step for normal print scenarios. The setup is pretty straight forward, let me walk you trough it!

    Topics discussed in this blogpost:

    • License requirements
    • Prerequisites
    • How to install the connector
    • Publish printers to Universal Print
    • Share the printer – to all or specific groups
    • Automate deploying printers using Intune
    • User experience
    • Troubleshooting
    • PowerShell Module
    • Decommission Universal Print
    • Useful links

    Prerequisites

    To print using Universal print solution, client devices needs to ensure the below prerequisites:

    Currently the administrator needs license to manage Universal Print, this is a big miss form Microsoft! In Universal Print Feature Requests there is a post from 2021 regarding this and current status is “Looking into it”. You can vote on this topic there and let Microsoft know this needs to be prioritized! Remove requirement of license for administrators.

    License requirements

    Universal print is included in Microsoft 365 Business Premium and above, the main difference is how many print jobs you have available per month and user. Furthermore Microsoft provides a add-on for more print jobs.
    The print jobs are pooled and divided by all users for reference see the following diagram:

    How to install the connector

    To connect the printers to Microsoft Entra you need to install a connector.
    The connector is called Universal print connector and can be downloaded from http://aka.ms/upconnector this will download the latest version of the connector.
    Install the connector on one of your on-premise print servers.

    Publish printers to Universal print

    After downloading and installing the connector you will need to login to your Microsoft tenant, the account needs to be a Printer administrator or Global administrator.
    Give the connector a name and now you and select witch printers should be published.

    Share the printer – to all or specific groups

    Navigate to Universal Print – Microsoft Azure and click Mange then Printers.
    Each individual printer added to universal print can be either shared to all or specific groups depending on your needs. to do this click on the printer you want to share and click share, in the next step select if the printer should be available for all users or specific groups, se details below:

    Automate deploying printers using Intune

    The end user that has access to the printer can add them trough “Printers & Scanners” by themselves or we can create a configuration policy in Intune and deploy the printer automatically.
    This is done utilizing the “PrinterProvisioning CSP” found here: PrinterProvisioning CSP | Microsoft Learn

    To deploy a printer trough Intune we need to create a configuration policy:

    1. In https://intune.microsoft.com, go to Devices > Configuration.
    2. Click Create > New Policy and choose the following:
    3. Platform = Windows 10 and later
    4. Profile type = Settings catalog
    5. Click Create
    6. As Name, enter a name for the configuration
    7. Click Next
    8. Click Add settings
      i. Now enter “Printer Provisioning” in the search box and click Search to
      the right to filter out all related policies, then check Printer Shared ID
      (User) and then click X (Close).
      ii. In a new browser or tab, browse to https://aka.ms/UPPortal.
      iii. Expand Manage and click Printers and then click on the printer you want to deploy.
      iv. The values displayed for Name, Printer Id and Share Id will be used in
      the Intune policy
      v. Go back to the Intune tab.
      vi. Enter the Printer Id in the Cloud Device ID (User) field.
      vii. Verify that Install is selected in the Install (User) field.
      viii. Enter the shared name in the Printer Shared Name
      (User) field.
    9. Enter the Share ID in the Shared ID (User) field. and then click Next.
    10. On the Scope tags select scope if you need, click Next again.
    11. On the Assignments page, choose the group you want to deploy the printer to er add all users and click Next, followed by Create.
    12. Wait a few minutes and the printer will be deployed on your device/devices.

    User experience

    If you deployed the printer automatically for the users trough Intune the printer will appear in Printers & Scanners and the user can start utilizing the printer.
    If you set the printer as available for all but not automatically deployed as mentioned above the users need to add the printer themselves.
    This is done by going to Printer and scanners and clicking “Add a printer or scanner” then toggling Work or school and then “Add device” on the printer that they want to install. This will install the printer and drivers on the device.

    Troubleshooting & Montioring

    Some common things to check for:

    • First to check: the users need to have a Universal Print license assigned to utilize universal print
    • The universal print connector logs evens in Event viewer found here: Applications and Services Logs > Microsoft > Windows > PrintConnector > Operational
    • Windows devices store information about the printers in: HKEY_CURRENT_USER\Software\Microsoft\PrinterProvisioning\UPPrinterInstalls
    • Microsoft has provided a extensive troubleshooting guide Troubleshooting – Universal Print | Microsoft Learn
    • Monitoring of utilization and print jobs can be done in the Universal print portal > Monitor > Usage and reports this gives us insights in deployed printers, remaining print jobs and utilization

    PowerShell Module

    Universal Print has a dedicated PowerShell module “UniversalPrintManagement”.
    The UniversalPrintManagement PowerShell module is designed for managing and administrating Universal Print resources from the command line.
    It can be used to:

    • Install-Module UniversalPrintManagement – Install the module
    • Connect-UPService – Connect to Entra
    • Get-UPPrinter – Get information about a single or list of printers
    • Set-UPPrinterProperty – Update mutable properties of a printer
    • Grant-UPAccess – Grant print access to a user or group or all users in the organization
    • Get-UPAllowedMember – Get information about users and groups that have print access to a specific printer
    • Get-UPConnector – Get information about a single or list of connectors
    • Remove-UPConnector – unregister connectors
    ###Share all printers###
    Import-Module UniversalPrintManagement
    connect-uPService
    
    $printers = get-upprinter
    foreach($printer in $printers.results){
        new-upprintershare -PrinterId $printer.id -ShareName $printer.displayname -confirm
    }
    ###Grant all users access to shared printers###
    Import-Module UniversalPrintManagement
    connect-uPService
     
    $Shares = Get-UPPrinterShare
    foreach($share in $shares.results){Grant-UPAccess -ShareID $share.id -AllUsersAccess}
    ###Remove all Shares###
    Import-Module UniversalPrintManagement
    connect-uPService
    
    $shares = get-upPrinterShare
    foreach($share in $shares.results){remove-upprintershare -ShareID $share.id -confirm}

    Above are some examples of the capability’s of the module for complete reference visit PowerShell Module – Universal Print | Microsoft Learn or use Get-Command -Module UniversalPrintManagement to see available commands.

    Decommission Universal Print

    Prepare to remove a connector
    • Navigate to Universal Print in the Azure Portal.
    • For all printers registered from the connector you wish to remove
    • If the printer is shared, delete the printer share.
    • Unregister the printer
    • Restart the “Print Connector service” (PrintConnectorSvc.exe) on the connector PC to clean up locally-stored data about the printers.

    Unregister the connector

    Once printers on the connector are no longer shared or registered in Universal Print, the connector can be unregistered from the Universal Print PowerShell module.
    Launch an elevated PowerShell window.

    1. Run Install-Module UniversalPrintManagement.
    2. Run Connect-UPService and sign in to Universal Print. NoteThe account used to sign in must be a Global Administrator or Printer Administrator and must be assigned a Universal Print license.
    3. Remove the connector by using the Remove-UPConnector cmdlet and passing it the ID of the connector you wish to remove.
    4. Restart the “Print Connector service” (PrintConnectorSvc.exe) on the connector PC to clean up locally-stored data about the connector.

    Finally uninstall the connector application

    Uninstall the connector app from the PC where the connector is installed. You can either uninstall the connector app from the Apps section in the Windows Settings app, or from Programs and Features in the Control Panel.

    Useful links